Green Bridge Growers
Follow us on...
  • Our Blog
  • Who We Are
  • What We Do
  • How We Do It
  • Contact Us
  • Press
  • Produce Orders

Welcome!

Hey there! Glad you could stop by to learn more about Green Bridge Growers, the innovative social venture with the mission of  growing good food and good jobs for young adults on the autism spectrum.

Contact Us

Cover Crops: Buckwheat Edition

11/24/2024

1 Comment

 
Picture

At Green Bridge Growers, we're big fans of cover crops. Cover crops are crops farmers or gardeners grow in their field to help enrich the soil when they’re not currently growing any crops there. They help suppress weeds, as well as improve soil quality and structure. This year, we piloted growing buckwheat as a cover crop. You may have heard of buckwheat as a grain that you can make into flour. But what if I told you buckwheat can also be used as a cover crop?

Buckwheat is a fast-growing cover crop. It reaches maturity in 70-90 days, and its flowers can attract beneficial insects. It's also better at extracting phosphorus from the soil than most other plants. Also, buckwheat can regrow after mowing if it's cut before it reaches 25 percent bloom. It’s also very effective at suppressing weeds, which it does through shading and competition.

It is usually used as a mid-summer cover crop. In the Midwest and Northeast, it’s often planted after the harvest of early vegetable crops, and then followed by a fall vegetable, winter grain, or cool-season cover crop.

If buckwheat is allowed to blossom, then it can also attract beneficial insects that parasitize pests. These beneficial insects include hover flies, predatory wasps, and ladybugs, among others.

We actually grew buckwheat in our fields this summer—25 pounds of it to be exact. We planted it on July 25, and it took 10 days for it to germinate. And it did an absolutely incredible job attracting bees. When we went to mow it down for the fall, there were thousands of bees on the buckwheat. We didn't have the heart to cut it down with so many bees feasting on it, so we decided to leave it alone for a few days. We finally mowed it down once all the bees were gone. But it sure was a sight to behold.

Growing buckwheat

In order for buckwheat to sprout, the soil needs to be 70°F or above. It grows best in moist, well-drained soil, and it does not tolerate drought or frost very well. Because it doesn't tolerate frost, it shouldn't be planted in the fall.

Buckwheat is usually planted 1 inch deep, but that can be adjusted depending on the moisture and soil. For optimal weed suppression, plant the buckwheat in narrow rows 6 inches apart.

Buckwheat prefers soils with a neutral or slightly acidic pH. It doesn't do very well in alkaline soil. It does well with modest fertility, and doesn't like too much nitrogen.

When it's time to kill off the buckwheat for the winter, mow or plow under it. The resulting decaying organic matter will enrich the soil with nitrogen and improve the moisture holding capacity of the soil.

I hope this encourages you to plant some buckwheat in your garden next summer as a cover crop. Let us know how it goes!

-Chris Tidmarsh

Additional resources:

https://www.sare.org/publications/managing-cover-crops-profitably/nonlegume-cover-crops/buckwheat/

Photo credit: Jorge Lorza, NRCS – USDA

1 Comment

Tomato Tips

6/1/2023

8 Comments

 
Picture
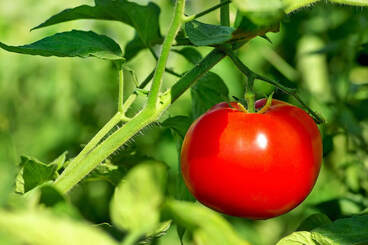
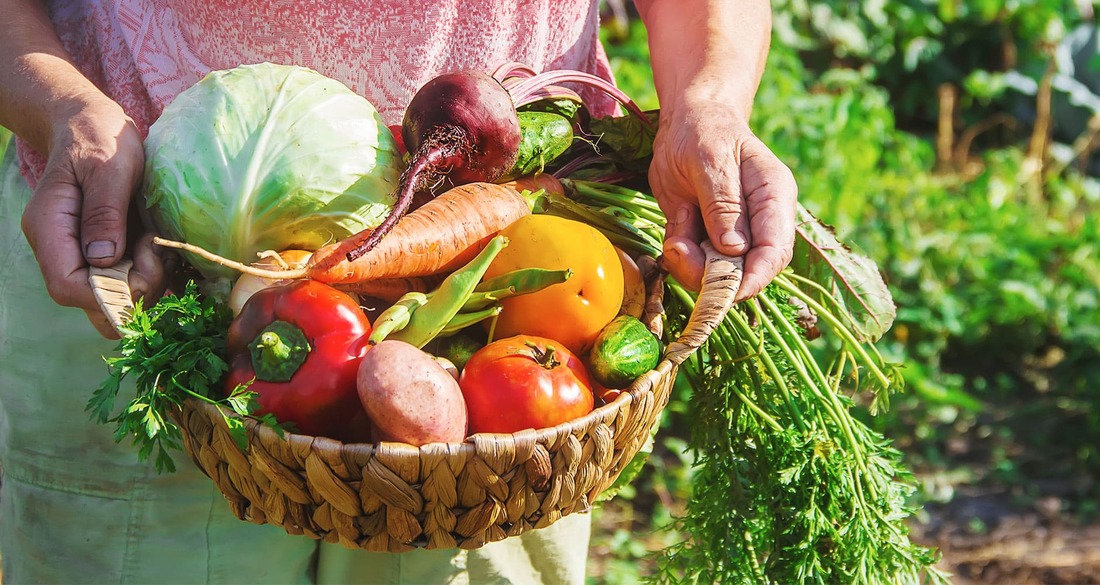
It’s getting to be the time of year to plant tomatoes. There’s nothing like eating a freshly picked tomato right off the vine, and this blog post will help you be able to grow them yourself.

Before you plant your tomatoes outdoors, you’ll need to get them acclimated to the outdoors for roughly a week. Be sure to leave them somewhere sheltered, and bring them indoors during the evenings, especially on cold evenings. As the week goes on, you can leave them outdoors for longer periods of time. A cold frame makes a great storage place for your tomatoes as you get them acclimated to the outdoor weather, and you can prop the lid open more and more as planting time approaches.

If you don’t have the time or the patience for growing tomatoes from seed, a plant nursery is always an option. Just be sure to inspect the plants before buying, to make sure they look green and healthy and aren’t too long and leggy.

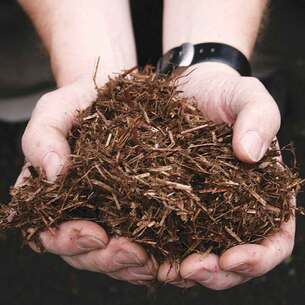
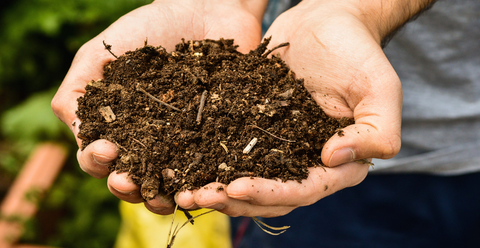
Tomato plants love sunshine and warmth. It helps them grow to their fullest potential so that you get nice-looking, tasty tomatoes. Also, tomatoes, like most vegetables, like a "Goldilocks soil" that retains moisture but is also well-drained and rich in nutrients. The best way to achieve this is to add mulch, manure, or other well-rotted organic matter in the weeks before planting.

Picture
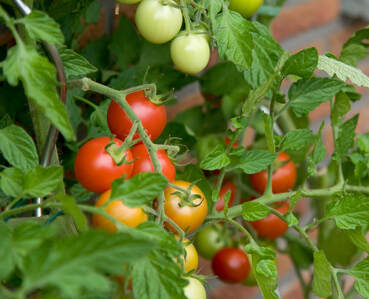
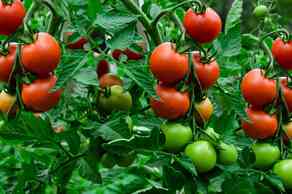
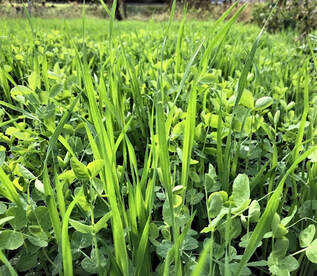
When it's time to plant your tomatoes, you'll want to make sure they have enough space and enough light. Indeterminate tomatoes, also known as vining tomatoes or cordon tomatoes, need at least 18 in. (45 cm) between them, and about 2 ft. (60 cm) between rows. This ensures that they not only get enough light, but also enough airflow to reduce potential problems with diseases.

Now, tomatoes can actually produce roots at any point along their stem. This means that you can dig holes deeper for them than you can for most other vegetables, to encourage roots to produce low down on the stem. More roots will help anchor the plant into position, and of course, more roots also means it can absorb more moisture to support more growth. So when you dig holes, dig them a bit deeper than the root ball to allow the plants to grow extra roots.

This part may sound a little crazy, but burying fish heads in the soil under your tomatoes can help add extra nutrients that the tomatoes then absorb as the fish heads break down and the tomato roots grow down through them. The Native Americans have been using fish in their Three Sisters companion planting for thousands of years. In any case, adding fish heads to the soil isn't too different than adding fish emulsion to the soil as a fertilizer. Just be sure to bury the fish with a little bit of soil before planting the tomatoes, so as not to attract foxes, cats, or dogs.

When you plant the tomatoes, try to avoid burying any of the leaves when you bury the stem. Feel free to pick off any leaves you need to in order to bury as much of the stem as possible.

Picture
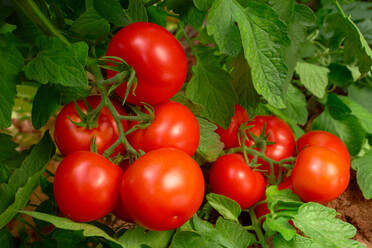
Your tomatoes will need supports in order to help keep the fruits off the ground and out of the hands of slugs or other animals that might eat them. The type of support you need depends on the kind of tomato. Determine tomatoes, also known as bush tomatoes, don't get much taller than waist height, so for them, you can simply use a shorter stake or a tomato cage. But indeterminate tomatoes (the vining or cordon tomatoes) can grow up to head height or taller, so for them, you'll need a taller support, like a tomato tower. If you don't have the money for an actual tomato tower, you can use a bamboo cane or a tall stake instead. Try to avoid stabbing the roots when you put the stake or tomato tower in the ground.

Also, for indeterminate varieties, you'll need to prune the side shoots that come off the main stem. This helps concentrate all the plant's energy into flower and fruit production. In warmer climates, you can probably get away with not pruning the stems, since tomatoes grow more vigorously in warmer weather. But in cooler climates, you'll definitely need to prune indeterminate tomatoes.

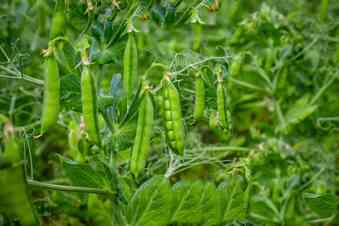
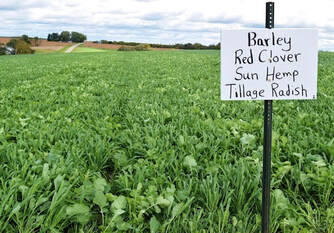
When you plant your tomatoes, you might want to consider planting companion plants with them as well, to help deter pests and also encourage the tomatoes' growth. GrowVeg recommends marigolds, dill, and basil as three options, but Burpee has more suggestions for companion plants for tomatoes (among other vegetables).

I hope this helps you learn how you can grow your own tomatoes. Please let us know how it goes!

-Chris Tidmarsh

8 Comments

Grow a Pizza Garden!

4/2/2023

9 Comments

 
Picture
Gardening doesn’t have to mean growing all sorts of obscure vegetables you’d never dream of eating. You can use your garden to grow meals you enjoy eating on a regular basis, such as a salsa garden for making homemade salsa, or a pizza garden for growing toppings for pizza. In this article, we’ll talk about how to grow a pizza garden.

You don’t need a large bed for a pizza garden—you can even grow one in containers. Also, a single paste tomato plant can give you 6 to 20 pounds of tomatoes.

When choosing a place for your garden, be sure to choose an area that gets at least 8 hours of sunlight every day. Your tomato plants will most likely be the biggest plants you’ll be growing, and you should keep your tomato plants at least 2 feet apart from each other and from your other crops to ensure they have enough space to grow. When planting, loosen the soil with a garden fork or a tiller, and then add a couple inches of finished compost to the soil to give the plants enough nutrients to grow.

You can also grow your pizza garden in containers. For large plants like tomatoes and peppers, you’ll need large pots or else large containers like 5-gallon buckets. As for smaller plants like basil and oregano, you can grow them in smaller containers, roughly 1 gallon in size. Also, if you properly pick basil by pinching off larger leaves just above two sets of new leaves, that will help encourage the basil to become a full, bushy plant rather than a tall one with fewer leaves. When you fill your containers, use potting soil rather than garden soil. Potting soil provides better drainage and doesn’t compact as easily.

Paste tomatoes are a great choice to grow for a pizza garden. They have drier flesh and fewer seeds than other kinds of tomatoes, which makes them an excellent choice for pizza sauce. There are many varieties of paste tomatoes, such as the red Amish Paste, the orange Illini Golden Paste, or the reddish-brown Black Plums.

Picture
Basil is another great ingredient for pizza. It comes in regular green varieties, as well as purple ones! It does best in rich, well-drained soil. Start your basil indoors, or else you can also direct seed it outdoors after all danger of frost has passed. Basil is a great companion plant for tomatoes, because it can help repel hornworms and whiteflies. It’s also believed to improve the flavor of tomatoes that grow near it.

Oregano is the quintessential pizza herb. It’s a perennial in zones 5 through 10, so if you live in those zones, you’ll only need to start it once. Start it indoors, and then once the danger of frost has passed, transplant it to your outdoor garden.

Onions are another popular addition to pizzas and pizza sauces. They’re also good at helping to deter pests. You can add bulb onions, bunching onions, or perennial onions to your pizza garden. Start bulb onions indoors well in advance. Perennial onions you will need to start in the fall.

Garlic is another good herb to add to pizzas and pizza sauces. Like onions, you will need to plan them well in advance. Start garlic in the fall.

You can also add peppers to your pizza garden as well. You can add bell peppers like Carolina Wonder, California Wonder, or Bull Nose, or you can add sweet banana peppers as well.

When planting the seeds, please read the seed packets carefully so as to properly care for your plants. Before transplanting, it’s a good idea to harden off your plants—that is, gradually expose them to the outdoors before you transplant them.

Use stakes and cages for your tomatoes and peppers. Tomatoes do best when they’re properly trellised and pruned, and peppers may need some support as well.

Also, be sure to give the plants enough water. They will be the most productive if they receive enough moisture.

And finally, get your friends and family involved in growing your garden! It’s more fun when more people are involved.

-Chris Tidmarsh

9 Comments

Healthier Soil = Healthier People

3/12/2023

10 Comments

 
Hello again everyone! Previously, we discussed the importance of healthy soil to ensure the production of healthy, bountiful crops. As a result of producing healthier crops, healthy soil translates to healthier people. An article from Outdoor America written by David R. Montgomery and Anne Bikle further explores this concept. In this article, we are introduced to the term phytochemicals. Phytochemicals are defined as bioactive nutrient plant chemicals in fruits, vegetables, grains, and other plant foods that may provide desirable health benefits beyond basic nutrition to reduce the risk of major chronic diseases. Types of phytochemicals include carotenoids, phytosterols, limonoids, polyphenols, glucosinolates, phytoestrogen, terpenoids, fibers, polysaccharides, and saponins. Phytochemicals are antioxidant-rich and offer health benefits ranging from liver detoxification to tumor suppression.
Picture


More information on types of phytochemicals and their benefits can be found here.

Factors such as an in increase in organic matter greatly improve plants' diet compared to soil where chemical fertilizers have been used. Healthy soil as a result of sustainable agriculture practices results in healthy crops that affect gene expression and the relationships they have with the soil microbiome. Crops can form symbiotic relationships with beneficial bacteria and fungi that transfer viral nutrients from the soil to plants we eat, or to forages that farm animals eat.

The idea that healthier soil creates healthier people proves the importance of incorporating sustainable farming practices into any farming operation. In previous blogs we have talked about examples of regenerative practices including crop rotations, reducing or eliminating tillage, and implementing cover crops. Montogomery and Bikle have compiled a list that includes the key components for healthier soil:
  • Minimize disturbance to the land by greatly reducing or eliminating tillage.
  • Keep the ground alive with living roots from other cash crops to keep the soil intact and in place, and soil life healthy.
  • Rotate a diverse array of crops on agricultural lands.
  • Reduce use of synthetic nitrogen fertilizers and pesticides.
With the implementation of these practices, farmers will be able to improve their soil health which produces healthier crops resulting in healthier people.

Additional resources:
  • Healthier Soil Means Healthier People
  • Healthy Soils – Healthy Food – Healthy People

​-Keely Charles

10 Comments

Planting a Smart Vegetable Garden

2/15/2023

192 Comments

 
Picture
Hello everyone! If you’re anything like me, you are eagerly awaiting warmer weather and the ability to start spending more time outdoors. Waiting for that sunshine is a perfect opportunity to start planning your garden! Today we are going to be going through some basic steps to planting a smart vegetable garden along with some tips and tricks to ensure a successful harvest! 
The time of year is very important to consider when planting your garden. It is important to wait until after the last predicted frost date to plant to help ensure success of transplants or seed germination. In addition, you should plant crops corresponding to the time of year that they thrive. This is because warm-season crops are more sensitive to late-season crops and may not survive if planted too early.

Cool Season Vegetables:
  • Lettuce
  • Peas
  • Spinach
Warm Season Vegetables:
  • Tomatoes
  • Peppers
  • Onions

Picture
It is also important to consider the time of year when planting because soil temperature plays a role in the success of crops. Most crops do well at a soil temperature of at least 60 F. You can find a complete list of soil preferred temperatures here. 
Next, you are going to want to decide if you will be growing your vegetables from seeds or transplants. Transplants are small starter plants that will be planted directly into the ground. Seeds provide a wider selection of vegetables but takes more time and planning than transplants. Some seed types include:
  • Hybrid seeds:
    •  Created by crossing two different parent varieties from the same species.
    • They combine the best traits of varieties to improve disease resistance, yield, and uniformity.
  • Open-pollinated seeds:
    • Have more genetic diversity and offer more variation than hybrids. 
    • Pollination occurs by insects, birds, wind, or humans. 
  • Heirloom seeds:
    • Open-pollenated varieties that have been handed down for generations, hand selected by gardeners for a specific.

If you decide that transplanting is the best option for your garden, here are 5 tips to ensure success:
  1. Hardening Off:
    • You will want your plants to acclimate to your gardens growing conditions by placing them outside in a shaded area for a few hours a day over seven to 10 days.
  2. Removing flowers:
    1. This helps to ensure that the plant’s energy foes towards root development and increases flowering and fruiting throughout the season.
  3. Mulching:
    1. Applying a 1- to 3-inch later of organic mulch around the plants base will help maintain soil temperature, conserve water, and reduce competition from weeds.
  4. Succession planting:
    1. Planting seeds multiple dates throughout the growing season can provide continual harvests of vegetables.
  5. Invite pollinators and other beneficial insects:
    1. Add flowering herbs, annual flowers, and native perennials to your vegetable garden to help provide natural pest protection.

Additional Sources:
  • Frost-Free Dates, https://www.canr.msu.edu/resources/frost-free-dates
  • Preparing the Smart Vegetable Garden, https://www.canr.msu.edu/resources/preparing_the_smart_vegetable_garden

​-Keely Charles

192 Comments

Using Organic Mulch to Improve Soil Quality

1/15/2023

38 Comments

 
Picture
Every spring when the weather starts to get warmer, my family heads to the garden section of Lowes to grab multiple bags of mulch to place around our home. When I was younger, I thought that placing mulch around the house was just my parents way of making the landscape look a little better. It wasn’t until recently that I learned of the benefits that mulching provides to soil quality.

Mulch can be used in many settings in addition to ornamental landscape beds like at my parents’ house. It can help smother annual weeds and reduce or eliminate cultivation, hand weeding and chemical weed control while contributing beneficial organic matter. Mulch can also regulate soil temperatures and soil moisture losses to create an ideal soil microbiome for
plant roots. Organic mulches actually break down which provides nutritional benefits to the soil over time.

There are two basic kinds of mulch, organic and inorganic:
    • Organic mulches include formerly living material such as chopped leaves, straw, grass clippings, compost, wood chips, shredded bark, sawdust, pine needles and even paper.
        • Inorganic mulches include black plastic and geotextiles (landscape fabrics).

For our purposes organic mulches provide the benefits we are looking for regarding soil health. Choosing a type of mulch is often based on personal preference and appearance. Different types of mulch have different lifespans and different nutritional benefits. For example, red pine and hardwood bark add organic matter to the soil as they decompose but do not supply much nitrogen while mulches from leaf tissue have the added benefit of supplying nitrogen. Mulches derived from leaf tissue can be produced at home from recycled material including compost, ground leaves, and pine needles. More about at home composting can be found here.

The general rule of thumb when it comes to applying mulch is to spread it about two to four inches thick over the soil surface. It is important to use the correct amount of mulch because if too thick, it can prevent water from reaching the soil. When the mulch layer is too thin, it may not inhibit weed growth or provide its other benefits. It is also important to prepare the surface before mulching. For example, if weed suppression is the goal of mulching, it is important to weed the area before applying mulch.

Overall, mulching can be an incredibly useful tool to improve soil health and control weeds when the proper type and amount is used. Additional sources on mulching and its benefits below:

Mulching 101: When, Why, & How to Mulch Your Garden

How to Choose the Best Types of Mulch to Keep Your Garden Beautiful

-Keely Charles

38 Comments

Winter Soil Health How-To's

12/15/2022

6 Comments

 
Picture
Soil health is extremely important to a successful garden, but many people don’t realize the best time to start improving your soil is before winter sets in. This video by GrowVeg helps explain how to do so.

The first option they suggest is to keep your soil covered. Bare soil almost never occurs in nature, and the reason for this is that it’s more vulnerable to erosion by wind, soil, and rain. Another benefit to covering your soil is that it makes it harder for weeds to grow. And when you use biodegradable materials as your mulch, you help feed the soil, including the organisms that live in the soil that help make the soil healthy, which in turn feed the plants.

The second option is to use compost and manure to help enrich your soil. The video recommends that you compost everything that can be composted—kitchen scraps, grass clippings, leaves, cardboard, newspaper, etc. This allows you to produce your own compost for free, which is part of the beauty of it. (I suggest you also try to maintain a balance between carbon-rich and nitrogen-rich materials in your compost, so as to allow the microorganisms in the soil to digest all the organic matter as efficiently as possible.)

Manure is also excellent for your garden, but you should get it from a trusted source. This is important because it makes it less likely you’ll get manure that’s contaminated with herbicides that can damage your crops. It’s smart to cover your soil in manure that’s about 1 inch (roughly 3 cm) thick before winter, to give the worms and microorganisms in the soil something to feed on over the winter. Also, you should let your manure sit for 6-12 months before you use it on your garden, because fresh manure is too strong for most plants.

In order to compost your kitchen scraps, you dig a hole large enough for your scraps, and then you pour them in, and then cover the hole back up. If you have plants that are typically very nutrient-hungry, then you may need more scraps. The scraps will break down over the winter, and then in the spring or summer, you’ll be able to plant your crops in the soil that contains the composted scraps.

Another option for composting is to cover the soil with leaves or wood chips. For fruit bushes, trees, and canes, you might consider wood chips, because their chunkiness causes them to break down more slowly, which helps suppress weeds for longer and releases nutrients more slowly, to feed your fruit plants more steadily. You can also use wood chips on your vegetable garden as well. Now, there is a myth that wood chips rob the soil of its nitrogen. They might, if you used lots and lots of them and dug them in. But if you use an inch or so on the surface and don’t dig it in, then you should be fine.

The third and final option is to use cover crops or “green manure”. Cover crops are plants that are grown with the sole purpose of protecting and improving the soil, and they do this by keeping it covered to protect it from the elements, by improving soil structure with their roots, and by decomposing back into the soil once they’re cut down. Field beans are one example of a cover crop you can grow in the fall—and yes, even though they’re a bean, they can be grown in the fall as a cover crop. They’re a super hardy kind of bean. The only thing is, you cut them down before they have a chance to produce beans, so you don’t actually get a harvest from them the way you do with other bean plants. The reason for this is that bean plants fix nitrogen in the soil, but when they flower, they use up that excess nitrogen. And you don’t want to let that happen, if you want to keep the nitrogen in the soil for your spring crops. The field beans will sprout before winter, and then you let them grow until mid- to late spring, when you chop them down. You might want to leave the roots in the soil to allow them to decompose, to help give the next crop more nutrients.

These methods should help you become a pro at keeping your soil healthy. Let us know how it goes for you using them!

-Chris Tidmarsh

Picture
6 Comments

Healthy Soil, Healthy Food

10/28/2022

12 Comments

 
Picture
Hi again! Today we’re going to be discussing the importance of soil health to ensure the production of healthy crops at home and on larger scale farms. If you are new to gardening, you might not know how important healthy soil is to any system. When you plant crops, they take a lot of nutrients out of the soil, so it is important to find ways to take care of the soil and preserve those nutrients for future crops. In addition to being the place where many plants grow, soil also filters and cleans water for human use, contains many different organisms that help with biodiversity, in addition soil actually holds an immense amount of carbon which helps to combat climate change.

According to our friends at the National Resources Conservation Service (NRCS), “Soil health is defined as the continued capacity of soil to function as a vital living ecosystem that sustains plants, animals, and humans.”

Some of the essential functions of soil include:
  1. Regulating water
  2. Sustaining plant and animal life
  3. Filtering and buffering potential pollutants
  4. Cycling nutrients
  5. Providing physical stability and support
More information on these functions of soil can be found here.

Now that we have discussed why it is important to keep soil healthy, we will touch on ways to improve soil health and soil structure. Some important principles to improve soil health include minimizing soil disturbance, maximizing soil cover, maximizing biodiversity, and maximizing presence of living roots. With the introduction of one or all of these principals, you can have healthier soil and great-looking crops anywhere!

Picture
Some practices that you can put into place at the farm or at home include no till or reduced till which can reduce soil erosion and soil compaction. The use of cover crops is a great method that can build soil organic matter, reduce erosion, and provide nutrients to future crops. Crop rotation is a practice that can reduce pests and diseases that are specific to certain plant species.

These are all practices that we have used here at Green Bridge Growers that have proved to help improve soil health in a sustainable and organic way. You can implement any of these practices to your at home garden to help improve soil health. If you are interested in learning more about cover crops as a way to improve soil health, you can check out my other blog all about cover crops and how we use them at the farm!

If you are interested in learning more about soil health, I have attached some helpful links below.

https://royalsociety.org/topics-policy/projects/soil-structure-and-its-benefits/#:~:text=It%20provides%20an%20environment%20for,contains%20immense%20levels%20of%20biodiversity

https://www.farmers.gov/conservation/soil-health

https://www.nrcs.usda.gov/wps/portal/nrcs/detailfull/national/soils/health/?cid=nrcseprd1850026

-Keely Charles

12 Comments

Growing Your Soil with Cover Crops

9/20/2022

2 Comments

 
Picture
Growing up, my parents have always been avid gardeners. In the backyard of my childhood home, we had plenty of space for crops such as tomatoes, cucumbers, zucchini, and an assortment of peppers. I wish I had the knowledge I do now about sustainable farming practices such as the use of cover crops to implement into my family’s garden to improve the quality and quantity of delicious vegetables available.

Cover crops are one of the many environmentally friendly farming practices that have been applied to both large-scale farms and home gardens. According to an article written by Andy Clark from SARE Outreach, “A cover crop is a plant that is used primarily to slow erosion, improve soil health, enhance water availability, smother weeds, help control pests and diseases, increase biodiversity, and bring a host of other benefits to your farm.” I find this to be a great definition of what a cover crop is because it explains how many benefits cover crops can bring to your farm.

Picture
Cover crops are really a long-term practice so it might take some time to see the true benefits they bring. The way cover crops work is after the season for a crop has ended and it has been fully harvested, it is time to plant a cover crop. For example, once a summer crop like tomatoes have reached the end of their lifespan, a cover crop is planted for the fall and winter months. Some cover crops that are widely used include grasses, legumes, brassicas, and non-legume broadleaves.

After planting your cover crop, you want it to mature as long as possible without making seeds. When the crop reaches maturity, you must figure out how you will kill it. By killing the crop, you are allowing it to provide nutrients to soil as well as protecting it from the elements. There are different ways to kill a cover crop depending on how much space you are taking up. For example, home gardeners typically mow or weed eat to kill their cover crops. An important component to take into consideration is whether the crop you’re working with will completely die from mowing. If not, the crop will regenerate, and the soil won’t receive the full benefits from the crop.

Picture
At Green Bridge Growers, we are big fans of cover crops! We have used cover crops to let the soil have a rest and absorb all of the important nutrients it needs to grow gorgeous vegetables in the following season. We have even used cover crops to alter the composition of sandy soil which in turn helps conserve soil moisture and become better for more picky crops. Hopefully this post has provided some general information on cover crops and how you can implement them in your garden at home! Just remember, it’s important to be patient and choose the right cover crop for your soil health needs. Below I have attached some additional resources for cover crops if you’re interested in checking it out.

https://www.sare.org/resources/cover-crops/

https://organicgrowersschool.org/gardeners/library/basics-of-cover-cropping/

https://joegardener.com/podcast/100-understanding-cover-crops-the-basics-and-beyond-with-jack-algiere/

https://www.youtube.com/watch?v=9i_ocliy4Qk

-Keely Charles

Picture
A table that includes different types of cover crops, the appropriate season to plant them, and benefits
2 Comments

The Aquaponics Advantage

8/15/2022

2 Comments

 
Hello everyone! Today we are going to be talking about aquaponics. Here at Green Bridge Growers, we are quite fond of aquaponics as a way to grow food sustainability. At our farm, we have a whole greenhouse dedicated to our aquaponics system that is made up of hundreds of koi fish along with nearly four hundred vertical towers that help us grow crops year-round.
Picture
Aquaponics is a sustainable farming system where fish provide nutrients for the growing plants. The system starts off when the fish are fed and in turn, they produce waste in the form of ammonia. Microbes in the system break down the ammonia into nitrates and nitrites which is very nutrient rich for the plants. After this, the water is pumped to provide a constant supply of water to the plants. When the roots take up the fish nutrients, it actually purifies the water which is cycled back to the fish tank. Essentially, aquaponics is a closed loop, self-sustaining system.

Aquaponics is a great method for people to grow their own food by using sustainable and organic farming practices. It is a great choice because a system can be set up anywhere and they can be all different sizes. At the farm, we have a greenhouse that helps us to grow year-round but you can definitely create your own system at home!

Some of the benefits of aquaponics include:
  1. Minimal land usage is required for aquaponics compared to conventional farming.
  2. No soil is involved which limits the production of weeds and worrying about soil health.
  3. Minimal water usage is required since the water used is mostly recycled.

Picture
Aquaponics is a very popular farming practice among sustainable and organic farmers because the use of fertilizers are not required, and the nutrients comes directly from the fish. When it comes to the types of plants able to be grown, it is important to consider temperature conditions and the time of year. For example, this summer at Green Bridge, we have been planting heat tolerant lettuce varieties to ensure the successful growth of our crops. In addition to the types of crops grown in an aquaponics system, it is important to consider the type of fish used in a system. Different fish can be used for different reasons, and some might have different needs. Some fish such as tilapia and salmon are used so that they themselves can be harvested when they get to a certain size. At Green Bridge we use ornamental koi because they can tolerate the range of temperature conditions that the Midwest offers.

There are many different types of aquaponics systems, some of which you can make at home! There are kits available to purchase or you can even use materials that you have at home. First, you want to consider your size constraints and the climate that your system will be in. Next, you will be able to better understand which crops you can grow and what kind of fish your system needs. There are many helpful sources for DIY aquaponics systems as well as systems available to purchase. I have attached a link below along with some other links with additional information on aquaponics.

https://gogreenaquaponics.com/blogs/news/ultimate-aquaponics-beginners-guide#:~:text=Aquaponics%20is%20a%20combination%20of,create%20an%20effective%20aquaponics%20system

https://fisheries.tamu.edu/aquaponics/

https://www.aquaponicsforbeginners.com/aquaponics-resources-for-beginners/

https://aquaponics.africa/2021/10/07/the-chemistry-behind-aquaponics/

-Keely Charles

2 Comments
<<Previous

    Newsletter Signup

    * indicates required

    About Us

    Green Bridge Growers is a social enterprise created to put to work the many gifts and skills of young adults with autism.  Our founders, Chris and Jan, are building an exciting venture that grows fresh local food and grows great jobs for autistic adults. We invite you to learn about us and follow our work! 

    Archives

    November 2024
    June 2023
    April 2023
    March 2023
    February 2023
    January 2023
    December 2022
    October 2022
    September 2022
    August 2022
    July 2022
    June 2022
    August 2021
    July 2021
    April 2021
    March 2021
    October 2020
    August 2020
    July 2020
    May 2020
    April 2020
    March 2020
    February 2020
    January 2020
    November 2019
    October 2019
    September 2019
    August 2019
    July 2019
    June 2019
    May 2019
    April 2019
    March 2019
    February 2019
    January 2019
    November 2018
    September 2018
    August 2018
    July 2018
    May 2018
    April 2018
    March 2018
    February 2018
    January 2018
    June 2017
    January 2017
    November 2016
    October 2016
    September 2016
    August 2016
    July 2016
    June 2016
    May 2016
    April 2016
    March 2016
    February 2016
    January 2016
    November 2015
    October 2015
    August 2015
    June 2015
    May 2015
    March 2015
    February 2015
    December 2014
    November 2014
    September 2014
    June 2014
    April 2014
    March 2014
    December 2013
    November 2013
    September 2013
    August 2013
    July 2013
    June 2013
    May 2013
    April 2013
    March 2013

    Categories

    All

    RSS Feed

    Tweets by @GreenBridgeGrow
    View my profile on LinkedIn
Green Bridge Growers
61591 Bremen Highway
Mishiwaka IN 46544


574-310-8190
[email protected]

  • Our Blog
  • Who We Are
  • What We Do
  • How We Do It
  • Contact Us
  • Press
  • Produce Orders